
To create or remove users, you need Administrator rights. You can easily check your current status by clicking on your name in the top right corner; your assigned role will be displayed here.
Note: There are two different roles on the platform – User or Admin.
Overview
- Admin & User / What is the difference?
- User Management
- Adding a user
- Deleting a user
Admin and user / what is the difference?
When you create a colleague in Risika, you choose whether they should be an administrator or a standard user. It is a small choice at the point of creation, but it decides what that colleague can change in the setup you share.
The difference is not about how much data you can see. It is about who is allowed to change the things you have in common. A credit policy applies to the whole organisation, and if everyone can edit it, nobody knows any more what your policy actually is. That is why settings of that kind sit behind the administrator role.
There is no limit to how many users you can create, and you can always change a role afterwards.
What only an administrator can do:
- Create, change and delete users on your agreement.
- Search for companies outside the Nordics. Access to data outside the Nordic countries sits with the administrator.
- Credit policy. Set up and change the rules that decide whether a company meets your requirements. A standard user can see the result on the credit check page, but cannot edit the rules behind it.
- Fraud module. Turn the module on and off and adjust what it reacts to.
The rule of thumb: an administrator changes the framework, a standard user works within it.
Monitoring lists: private and public
When you create a monitoring list, you choose whether it should be private or public. That choice decides who can reach it, and what they are allowed to do with it.
A private list is yours alone to begin with. You can share it with selected colleagues, and they can then see the list, add companies and set up a monitoring email on it. They cannot delete companies from the list.
A public list can be accessed by everyone in your organisation. Here colleagues can both add and delete companies and set up their own monitoring email.
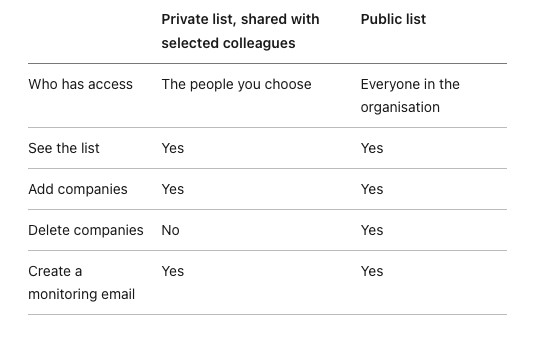
One thing that often comes as a surprise: a monitoring email is personal. It does not follow the list. Every colleague who wants to be told about changes has to go into Notifications themselves, choose the list and choose what they want to hear about. In practice that makes good sense, because finance and sales are rarely interested in the same changes.
Why it is worth thinking about
The usual pattern is that a list starts out private with whoever created it, and that more colleagues gradually come to need it. This is where the difference suddenly becomes concrete: on a private shared list, nobody else can clean up. Companies you no longer trade with stay on it, and the list grows until it is hard to use.
A public list, on the other hand, can be cleared by anyone, including by accident. If the list is going to be used for something fixed, for example credit monitoring that the finance department answers for, private and shared is the safer choice.
Give the roles the same thought. If you only have one administrator and that person is on holiday, nobody can create a new colleague or adjust the credit policy in the meantime. Two administrators is rarely too many.
If you are unsure what you have set up today, write to us and we will look at it together.
User Management
To access User Management, where you can manage your accounts, click on your name in the top right corner and select Settings.
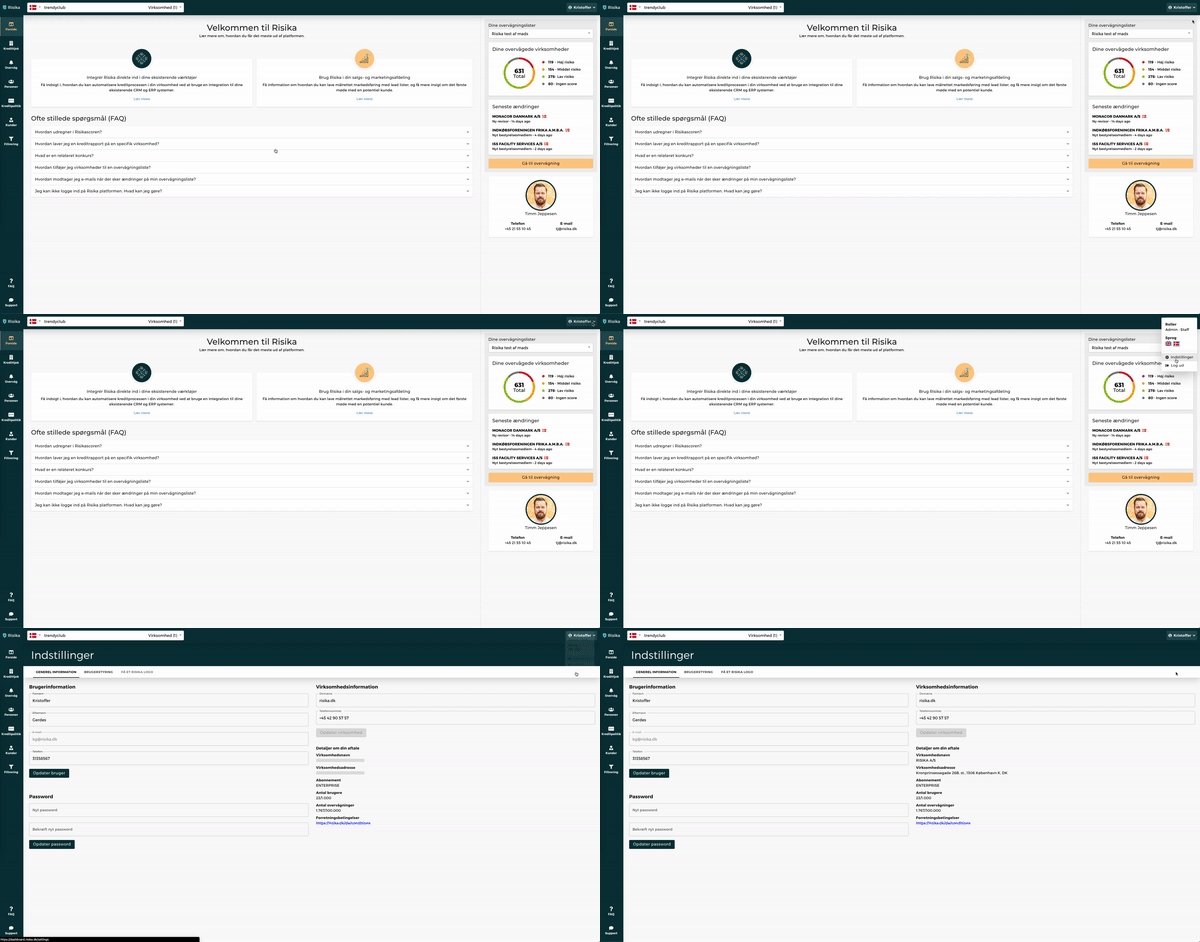
You will now land on the General Information page, where you can edit your own details. To manage colleagues, select the User Management tab in the menu.
Adding a user
You can create a new user by clicking the small plus icon (+) on the right side.
Here, you enter the user's name and email address, and select whether they should be assigned the role of User or Admin.
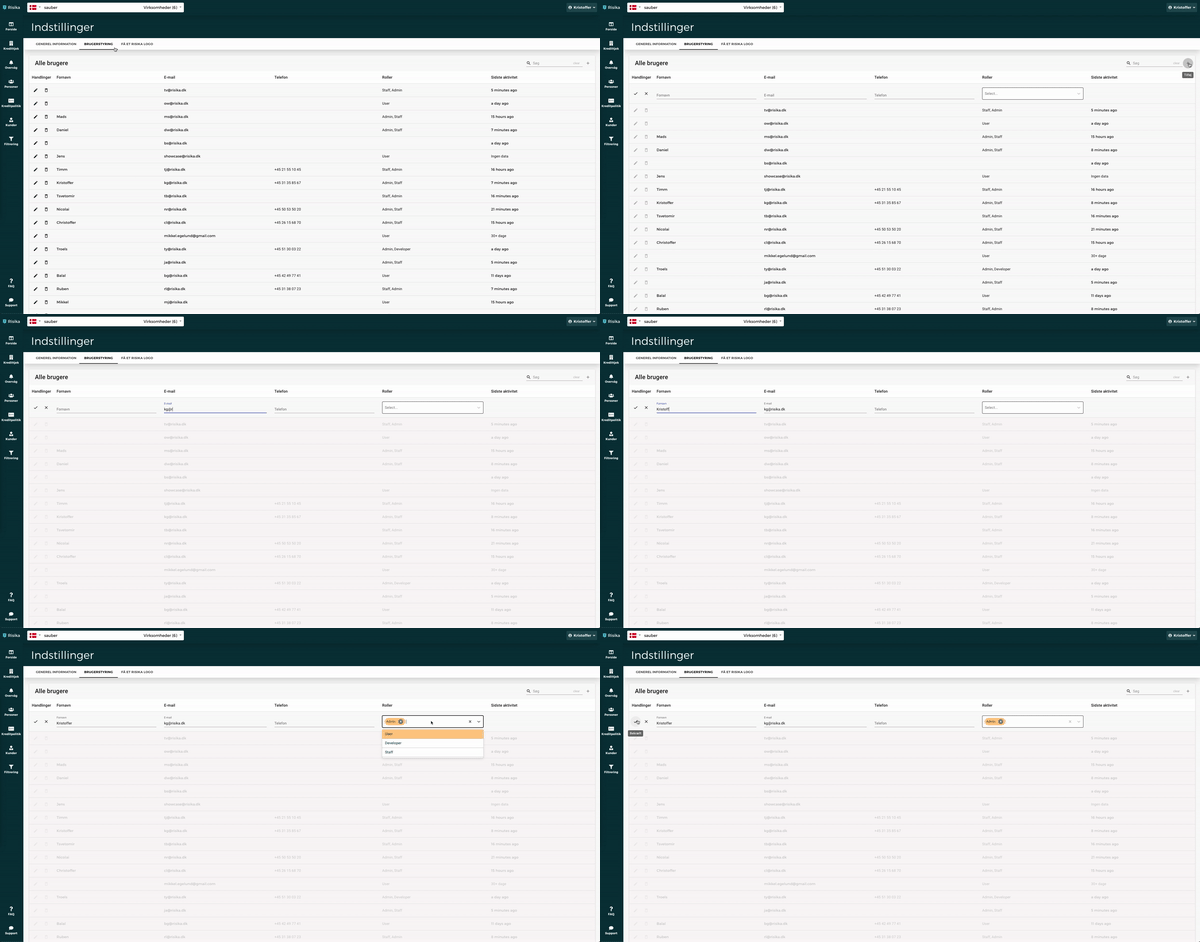
Tip!: Always remember to fill in the user's name. This ensures a better user experience and makes it easier to identify individual users in the overview. It is important to remember to add the user's name, as this provides a better user experience.
Deleting a user
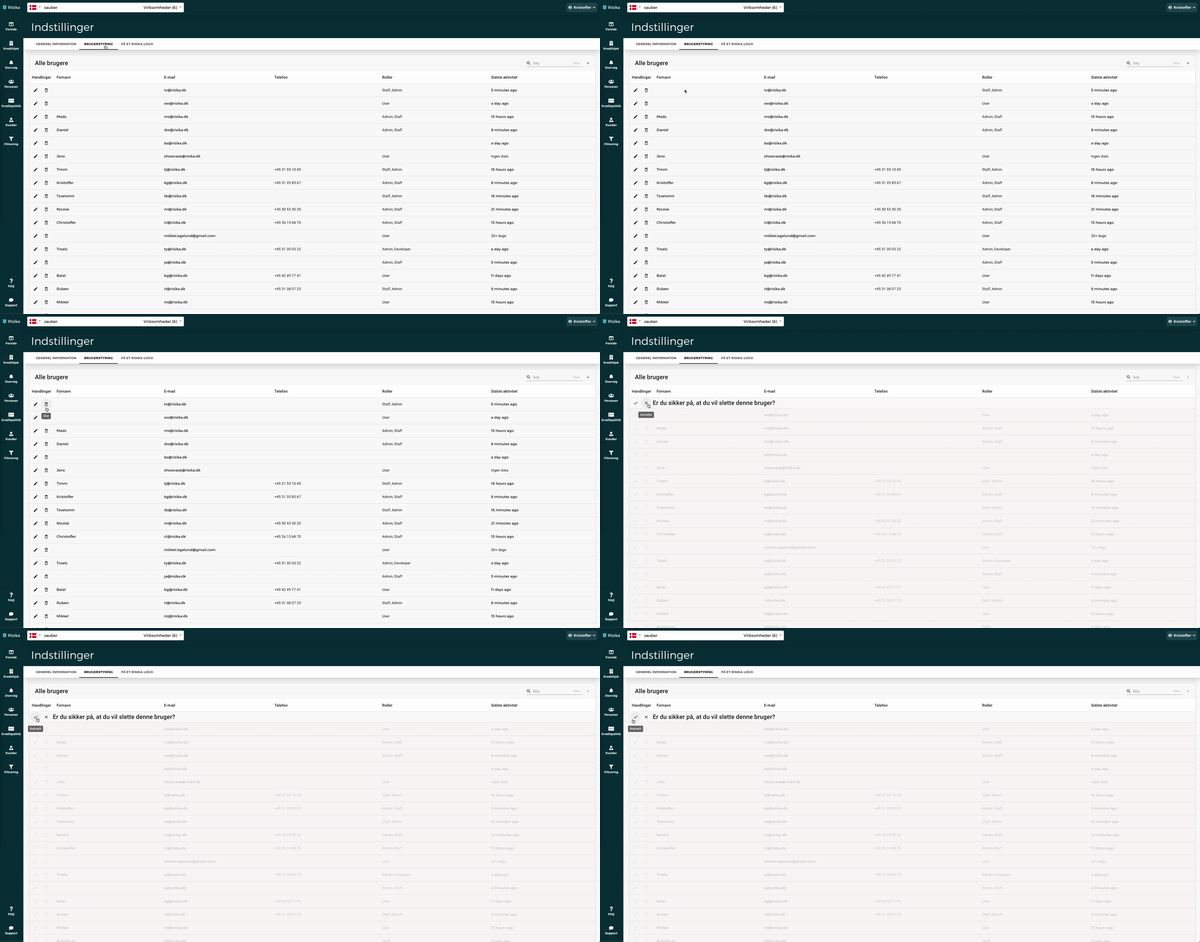
If you wish to remove a user, simply click the trash can icon next to the relevant person. Then, just confirm your choice to complete the deletion.
Need help?
Are you ready to take the next step in optimizing your credit process, or do you need technical sparring for your current solution? We are always ready to help you move forward.
Write to us: You are always welcome to contact us directly at contact@risika.com.
Book a walkthrough: We are happy to provide a live demo showing how our data can be tailored exactly to your workflows.