In this article, we will guide you through how to set up email notifications for your monitoring list.
Note: The setup of notifications is user-specific. This means that each individual user must configure their own notifications on the platform.
Note: Private lists are only visible to you, while public lists can be accessed by everyone in the company, as well as via integrations and API. Therefore, if you want to set up notifications for other people's lists, the list must be public.
Overview
You can set up notifications for your monitoring lists in four quick and simple steps:
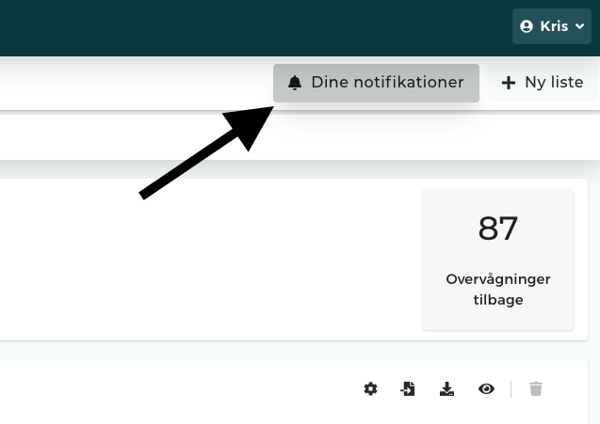
Your notifications
Start by clicking on Your notifications.
Add notifications
Then click on the yellow button labeled Add notifications.

Modifying and selecting lists
In this step, you need to decide on four things:
Selecting a list: Which list do you want notifications for? (If you have multiple lists, you can easily select more than one).
Type of changes: Which events do you want to be notified about? We always recommend selecting "Important changes" ("Vigtige ændringer"). Additionally, under "General changes" ("Almindelige ændringer"), you can check the boxes for the exact updates that are relevant to you.
Language: What language do you wish to receive the email in?
Frequency: How often do you want to be notified? Choose between daily, weekly (where you select the day of the week yourself), or monthly.
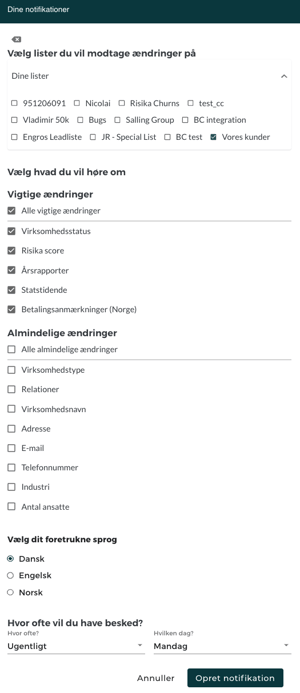
Finish by clicking Create notification.
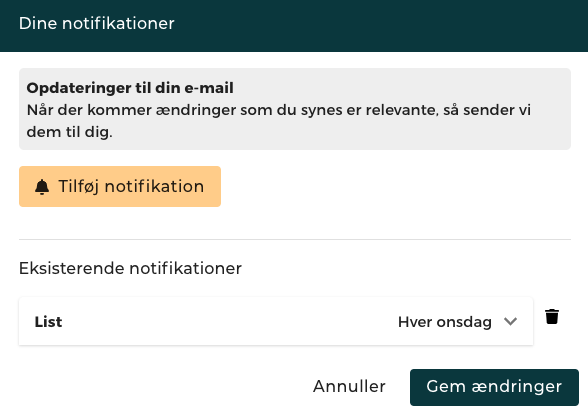
Existing notifications
If you click on Your notifications again, you will now be able to see your newly created notification under the Existing notifications section.
Now you are all set! You will receive emails from now on as soon as changes occur for the companies on your monitoring list.
Need help?
Do you have questions about this feature, or is there anything else we can assist you with? You are always very welcome to reach out to us. Write to us at support@risika.com or use the live chat directly on our website.