Welcome to the user guide for Risika's NAV integration. As described in our implementation guide, the integration supports selected versions of NAV. If you haven't read the implementation guide yet, you can find it here: https://help.risika.dk/implementering-af-nav
Supported NAV versions for the Risika integration:
2013, 2013R2, 2015, 2016, 2017, 2018
Note: The images in this guide are taken from Business Central (BC), but the functionality and procedure are exactly the same in NAV.
Overview
- Risika credit module
- Creating customers and vendors
- Automatic data update
- Monitoring customers and vendors
- Risika setup
- Video guide
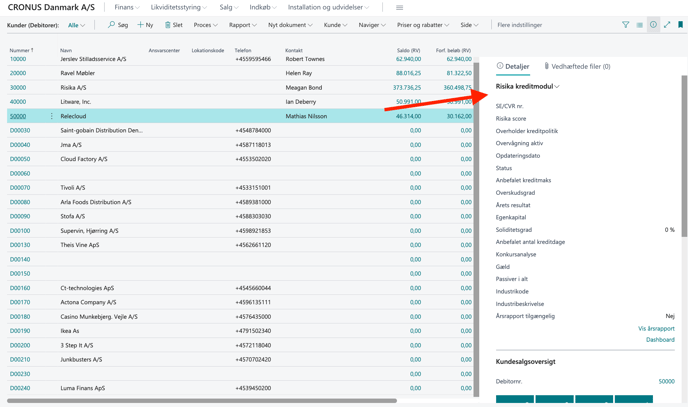
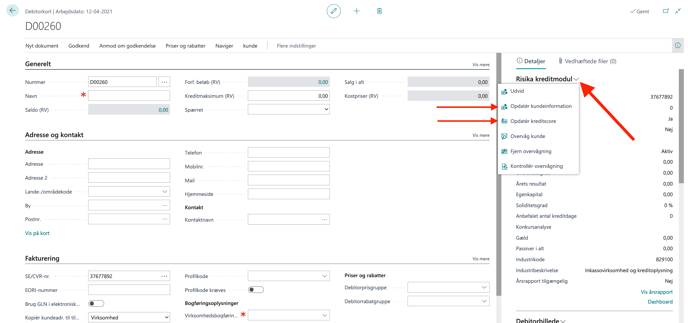
Risika credit module
You will find Risika's credit module on the right side of your screen in NAV. The first time you open it, the module will be empty until you choose to load data.
The credit module is easily accessible, whether you are working on a customer, vendor, or contact card.
Creating customers and vendors
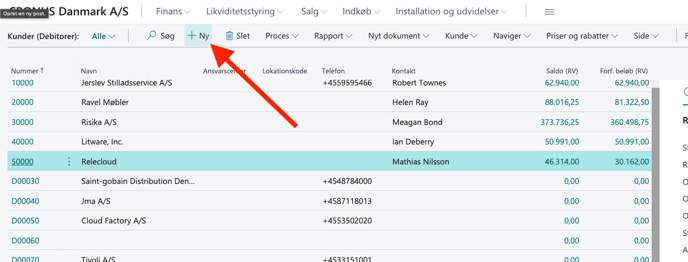
Auto-fill on a blank customer/vendor card
Save time by letting Risika fill in the master data for you. Simply follow these steps:
- Click "New" in the top menu.
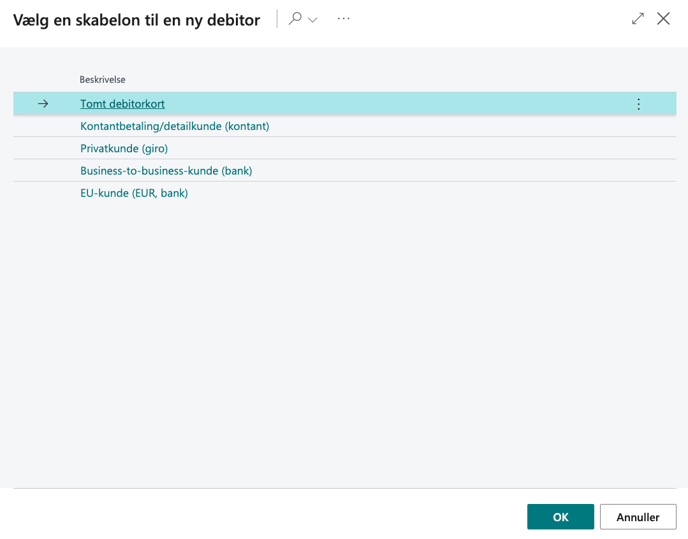
- Select "Blank customer card".
- Enter the company's CVR number in the "VAT Registration No." (SE/CVR-nr.) field.
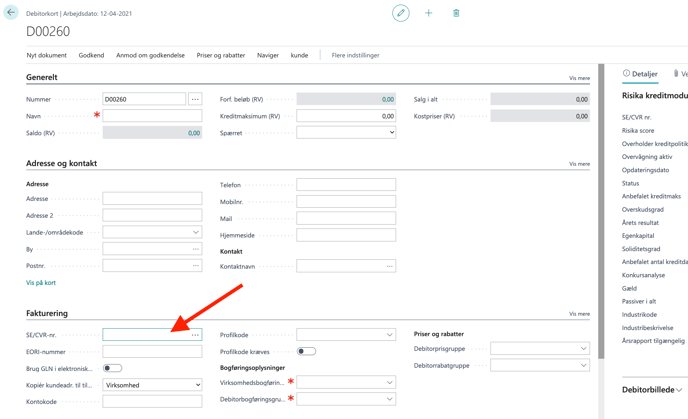
- Go to Risika's credit module on the right side and click "Update company" or "Get credit rating".
- The system will now automatically retrieve all relevant financial information and master data for the company.
Automatic data update
You can set up NAV to automatically fetch fresh data from Risika's database, ensuring you are always working with the latest information. This is done via Job Queue Entries, which are controlled using the following parameter strings:
"RATING": Automatically updates key figures for all customers with a valid CVR number.
"CUSTOMER": Automatically updates customer information (based on your selections under "Update customer fields" in the setup) for all customers with a valid CVR number.
"CHECKMONITORING": Automatically checks if monitoring is active for customers with a valid CVR number. This is typically used if monitoring is activated directly from the Risika Dashboard.
"MONITORING": Automatically adds all customers with a valid CVR number to live monitoring at Risika.
The Job Queue Entries are configured in the setup for Risika's credit module and are described in more detail in our general setup guide. This is often a task your IT department can quickly help with. You are, of course, always welcome to contact us if you need assistance.
Monitoring customers
Through NAV, you have easy access to put customers under monitoring on the Risika platform.
How to do it:
Open Risika's credit module on the desired customer.
Click Monitor company.
The customer is now automatically added to the monitoring list you selected in the setup.
When a company is being monitored, you can choose to receive email notifications for important changes. This notifies you immediately if, for example, a customer gets a new Risika score or if there are signs of an impending bankruptcy.
If you want to know more about how monitoring works and how to activate email notifications, you can read our detailed guide here: https://help.risika.dk/overvågning.
Risika setup
Below you will see an overview of the setup options for Risika directly in NAV. We will go through the different sections below the image.
(Note: Some of the displayed settings may vary and might not be available in all older NAV versions).
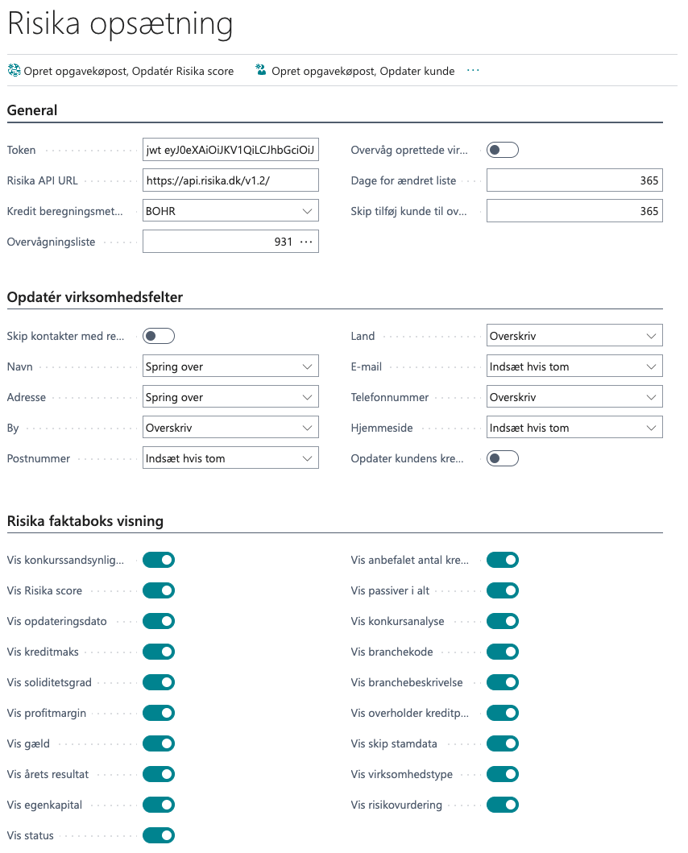
General
The first three fields ("Token", "Risika API URL", and "Credit calculation method") are described in detail in the implementation guide: https://help.risika.dk/implementering-af-nav: https://help.risika.dk/implementering-af-nav
Monitoring list: Here you select which specific list in Risika your monitored companies should be added to.
Monitor created companies: Turn this feature on if you want the system to automatically monitor all new companies you create.
Update company fields
Skip contacts with relation: Select this to let the system skip contacts that already have a relationship with a company.
Update customer's credit max: NAV has its own built-in field for a credit maximum. If you turn this feature on, Risika's recommended credit max will overwrite the value in NAV. If you turn it off, you retain your own manual credit max but can still see Risika's recommendation in the module.
Remaining fields: Here you have full control over which master data fields Risika is allowed to update. For each field, you can choose between the actions: "Skip", "Insert if empty", or "Overwrite".
Risika FactBox display
Under this section, you can customize the appearance of the credit module itself. If there are specific key figures or data fields that are not relevant to you, you can easily turn them off here so the FactBox remains clear and easy to read.
Video guide for Risika's NAV integration
Want to see it all in practice? In this video, we take you through how to use Risika's integration in your daily work, and show you step-by-step how to set up the integration.
Help
Are you left with questions about the setup, or do you want advice on how to best build your credit rules in the system? Our team is ready to help you get off to a good start so you can get the most out of the integration.
You are always welcome to contact us:
E-mail: Write to us at support@risika.com
Live chat: You can easily reach us via the chat, which you will always find in the bottom right corner of the platform.